It can be helpful to organize your development flow with NuGet packages, but then you need to figure out where to store them. Unless you want them to be publicly available, you would like to store them in some private registry. There are various options for hosted and self-hosted registries, but if you already use GitLab for your codes, it is worth checking out the GitLab Package Registry.
Setup
The package registry is available for standalone projects and projects within groups. Keep in mind that if your project belongs to a group, then packages published to the project-level registry will also be available across the group but only to the members of the project. If you have projects A and B belonging to the same group and you want the members of project B to access the registry of project A, then you should grant those members access to project A as well.
As of February 2025, at the time of writing this post, GitLab does not support publishing NuGet packages to a group-level registry. So, if you want to share a package across multiple projects in a group, you must publish it to a specific project’s registry and configure access accordingly.
The package registry is enabled by default unless you have a self-hosted GitLab and the administrator disables it. And if it is enabled, you can find it under ‘Deploy’ on the left menu.
Publish
The very first step is to pack the package before the build. For old-style .csproj
files, we have to use nuget pack, but let’s assume we have a modern fancy SDK-styled
project. Also, I like to put the packages into a separate folder to make things clean
and not bother looking for a proper bin\Release\net9.0\whatever folder:
build_and_test:
  script:
    - dotnet restore
    - dotnet build --configuration Release --no-restore
    - dotnet test --configuration Release --no-build --verbosity normal
    - dotnet pack --configuration Release --no-build --output ./nupkg
  artifacts:
    paths:
      - nupkg/
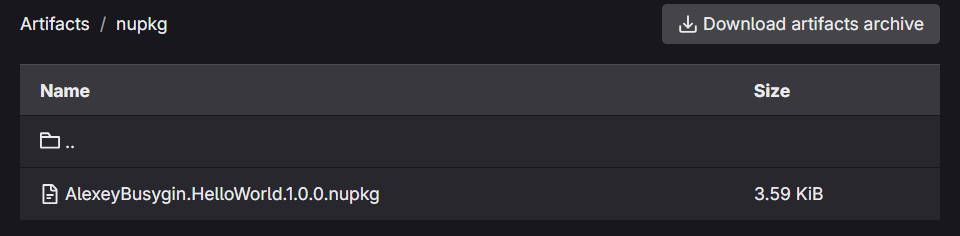
Of course, you can use different build configurations and other parameters, but ultimately, we want our package to appear in the job’s artifacts.
Now it’s time to publish. No matter the project type, we can always use
dotnet nuget since our package is already packed. We just need two things
to publish it: API key and registry URL.
dotnet nuget push "./nupkg/*.nupkg" --api-key $NUGET_API_KEY --source $NUGET_REGISTRY_URL
And we are lucky because everything is already available in the pipeline variables! For the API key,
we use CI_JOB_TOKEN. That’s a token to authenticate with many GitLab APIs and registries.
You can see all of them here. The registry
URL we create with GitLab’s API root URL and project ID as follows:
variables:
  NUGET_REGISTRY_URL: "${CI_API_V4_URL}/projects/${CI_PROJECT_ID}/packages/nuget"
  NUGET_API_KEY: $CI_JOB_TOKEN

publish_package:
  stage: publish
  script:
    - dotnet nuget push "./nupkg/*.nupkg" --api-key $NUGET_API_KEY --source $NUGET_REGISTRY_URL
  dependencies:
    - build_and_test
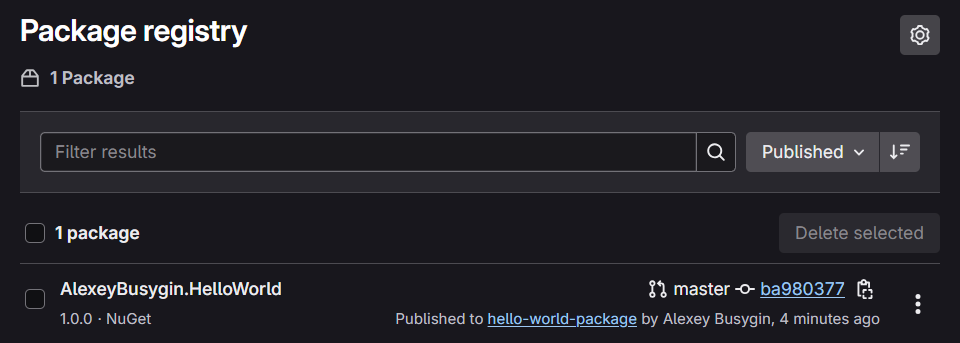
Let’s execute the pipeline, and here we are; our NuGet package is in the registry:
Consume
The publishing of a package is only half of the story. Now, we want to install a package from
our registry. To achieve that, we need to inform NuGet about the new source of packages: our
GitLab packages registry. Both nuget and dotnet nuget use the same list of sources,
so we can use dotnet nuget for setup, even if we use nuget for package management. We will
need the feed URL, username, and password. Feed URL can be for a group or a project:
https://gitlab.com/api/v4/projects/PROJECT_ID/packages/nuget/index.json
https://gitlab.com/api/v4/groups/GROUP_ID/-/packages/nuget/index.json
Please note that there is no dash in the URL for a project-level feed. You can find a project or group ID on the corresponding settings page.
What about username and password? If you are running things locally, then a
personal access token with the
read_api scope would work absolutely fine:
dotnet nuget add source FEED_URL --username YOUR_GITLAB_USERNAME --password PERSONAL_ACCESSS_TOKEN --name "Super Registry"
The name parameter sets a friendly name for the registry. Let’s check if everything is in place now:
> dotnet nuget list source
Registered Sources:
  1.  nuget.org [Enabled]
      https://api.nuget.org/v3/index.json
  2.  Microsoft Visual Studio Offline Packages [Enabled]
      C:\Program Files (x86)\Microsoft SDKs\NuGetPackages\
...
  5.  Super Registry [Enabled]
      https://gitlab.com/api/v4/projects/68442449/packages/nuget/index.json
And your registry will automatically appear in the Visual Studio, cool! You can verify this under Tools → NuGet Package Manager → Package Sources.
Consume in the CI/CD pipeline
Using personal access tokens in the CI/CD pipeline is not a good practice. It’s even in their names
that they are for personal use. Can we use CI_JOB_TOKEN again? Let’s give it a try. Prepare the YML:
build:
  image: mcr.microsoft.com/dotnet/sdk:9.0
  stage: build
  before_script:
    - dotnet nuget add source $NUGET_FEED_URL --name "Super registry" --username gitlab-ci-token --password $CI_JOB_TOKEN --store-password-in-clear-text
  script:
    - dotnet restore
    - dotnet build
Here, we use CI/CD variable NUGET_FEED_URL to store our feed URL. That makes things cleaner, and we can reuse this variable across pipelines and projects.
You can also notice store-password-in-clear-text. We have to use it because NuGet can’t encrypt passwords
on non-Windows platforms. This is because NuGet for Windows uses Data Protection API for password encryption,
but Mono doesn’t support DPAPI encryption. It’s
a long story if you want to dive into the details. However,
we must keep in mind that on non-Windows build runners, the password will be stored in plain text.
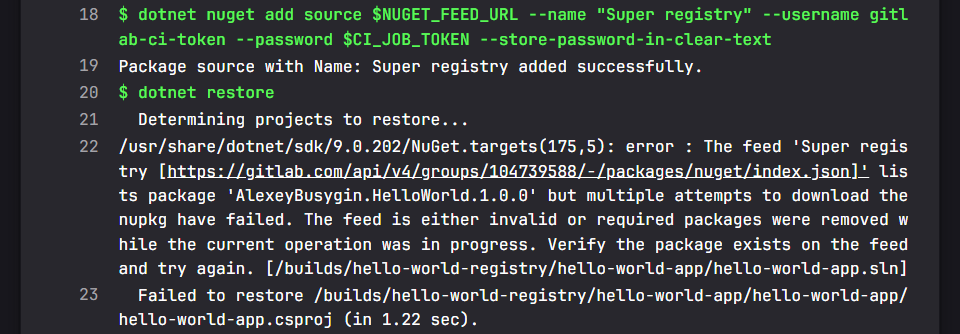
Now, run the pipeline, and… NuGet can see the package but can’t download it. Sigh.
No luck with CI_JOB_TOKEN, but we can use the deploy token instead! You will need a group deploy token
or a project deploy token, depending on the type of registry you are using. And it should have
read_package_registry scope. Let’s create one (you can follow this instruction)
and store them in the CI/CD variables:
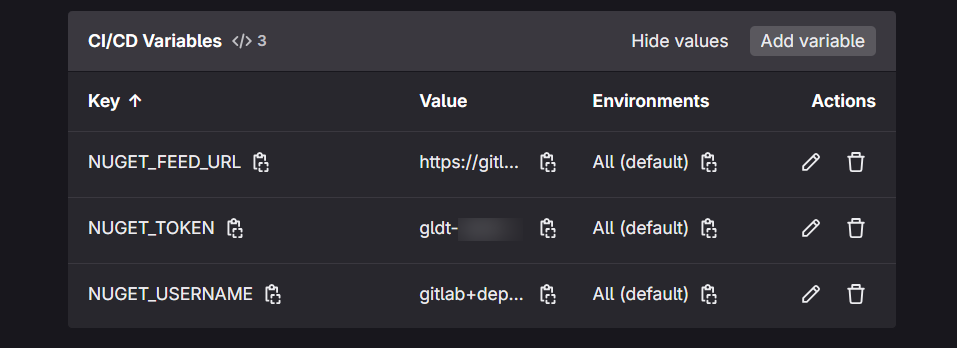
Update the YML:
build:
  image: mcr.microsoft.com/dotnet/sdk:9.0
  stage: build
  before_script:
    - dotnet nuget add source $NUGET_FEED_URL --name "Super registry" --username $NUGET_USERNAME --password $NUGET_TOKEN --store-password-in-clear-text
  script:
    - dotnet restore
    - dotnet build
And rerun the pipeline… Success!
$ dotnet restore
  Determining projects to restore...
  Restored /builds/hello-world-registry/hello-world-app/hello-world-app/hello-world-app.csproj (in 1.02 sec).
Updating NuGet source
If you build with a fresh Docker image every time, then calling dotnet nuget add source is no problem. But
if you don’t use Docker builds and run your own build server instead, you will notice that adding the NuGet
source a second time will fail. You can ignore it, but that approach breaks if you change the deploy token.
NuGet will no longer be able to download packages from the registry source using the old token. A better way
is to check the list of existing sources on every execution and update them to keep the deploy token
credentials up to date:
variables:
  SOURCE_NAME: "Super registry"

build:
  before_script:
    - dotnet nuget list source | grep -q "$SOURCE_NAME"
      && dotnet nuget update source "$SOURCE_NAME" --source $NUGET_FEED_URL --username $NUGET_USERNAME --password $NUGET_TOKEN --store-password-in-clear-text
      || dotnet nuget add source $NUGET_FEED_URL --name "$SOURCE_NAME" --username $NUGET_USERNAME --password $NUGET_TOKEN --store-password-in-clear-text
Pay attention to the quotes around "$SOURCE_NAME". We need them because quotes for "Super registry"
in the variables section are eaten by GitLab.
Build on Windows machine
If you do .NET development, there is a chance you have to build on Windows. No problem, we can have it all for Windows too:
before_script:
  - $sourceExists = dotnet nuget list source | Select-String -Quiet "$env:SOURCE_NAME"
  - |
      if ($sourceExists) {
        Write-Host "NuGet source exists. Updating..."
        dotnet nuget update source "$env:SOURCE_NAME" --source "$env:NUGET_FEED_URL" --username "$env:NUGET_USERNAME" --password "$env:NUGET_TOKEN"
      } else {
        Write-Host "NuGet source not found. Adding..."
        dotnet nuget add source "$env:NUGET_FEED_URL" --name "$env:SOURCE_NAME" --username "$env:NUGET_USERNAME" --password "$env:NUGET_TOKEN"
      }
If you are using hosted GitLab Windows runners, access to Windows Credential Manager is restricted
for the runner user. Therefore, you will need to use the --store-password-in-clear-text parameter
when managing NuGet sources.
***
We looked at how to use GitLab Package Registry as a private NuGet registry. We covered everything from setting it up and publishing packages in your CI/CD pipeline to managing access and tokens. With this setup, you can keep your package management clean and secure within GitLab.
NuGet package complete source code
NuGet package consumer complete source code
Last modified on 2025-02-22